Monday, November 28, 2011

Life just gets in the way!

Life just gets in the way! I swear that's what seems to happen every time I turn around lately!
I have been busy with work, and my family and getting ready for a vacation... the kind that involves all 3 kids, and going to see my Mom and her hubby. YICKS!!
I'm seriously thinking I need my head examined for letting my hubby convince me that 3 weeks before Christmas this is a grand idea and is going to be fun. But hell I've always been a sucker for a vacation of any type, and seriously he could convince me that a trip to the sun would be fun on the hottest day of the century. (But don't tell him that, LOL)


That said I'm trying to cram all my clients in days before I leave, as well as get every thing packed and ready to go. Along with the usual: listening to a million present requests from the kids, doing a ton of Christmas shopping and then there's the fact that we ended setting up our tree over 2 weeks early. (It would have never ended up done and decorated when we get back, I'm so over booked it's not funny!)


I have done some crafting over this last month, and I need to post the photos for them as well as allot of swap things so this posting is a big one, to get (myself). everyone caught up. (Can you ever get caught up on life?!? Is anyone ever done doing laundry?? Is there ever enough hours in a day!? OMG! All I want for Christmas is a personal assistant, OK?)

So first off I've been getting some great mail!

 My Darling girl, helping Mommy craft.. sorta.
So a while ago I got this awesome envelope full of stuff that we were supposed to take parts of the contents from and make something wonderful. The lady (I unfortunately can't remember who, and can't seem to find the rest of the envelope or other contents at the moment SORRY awesome mystery envelope lady!), SHE  sent me a whole lot of PINK stuff!
 And this was the result of that; an awesome paint swatch tea party tag!
I absolutely LOVE PINK!
And all the romantic pink bits were just what I needed that day.
This beauty only took 15 mins to make start to finish.
SUPER SONIC INSPIRATION WAS FOUND IN THAT 1 TINY ENVELOPE!
THANKS!!!

Now this one was through swap-bot and was an international tea swap.
What de-lish goodies!

I also joined a swap for some recipe cards thinking they would be great for random journaling.
 So cool!

Then also through swap-bot a great Ephemera themed ATC
 Thanks again Jenn for the extra goodies!

I also did this swap through Tee's site for 10 hat/ stick pins.
We had to not only make some fancy pins to send our partner, but some sort of display
or holder for them as well.
Here's the lovely set I received!
 Outside front

 Close up of the beautifully designed pins inside!

 Close up of the front flower pin
 Thanks again so much!
I absolutely love them all! 

Then I traded for a Thanksgiving themed ATC through:
Blissful ATC swaps

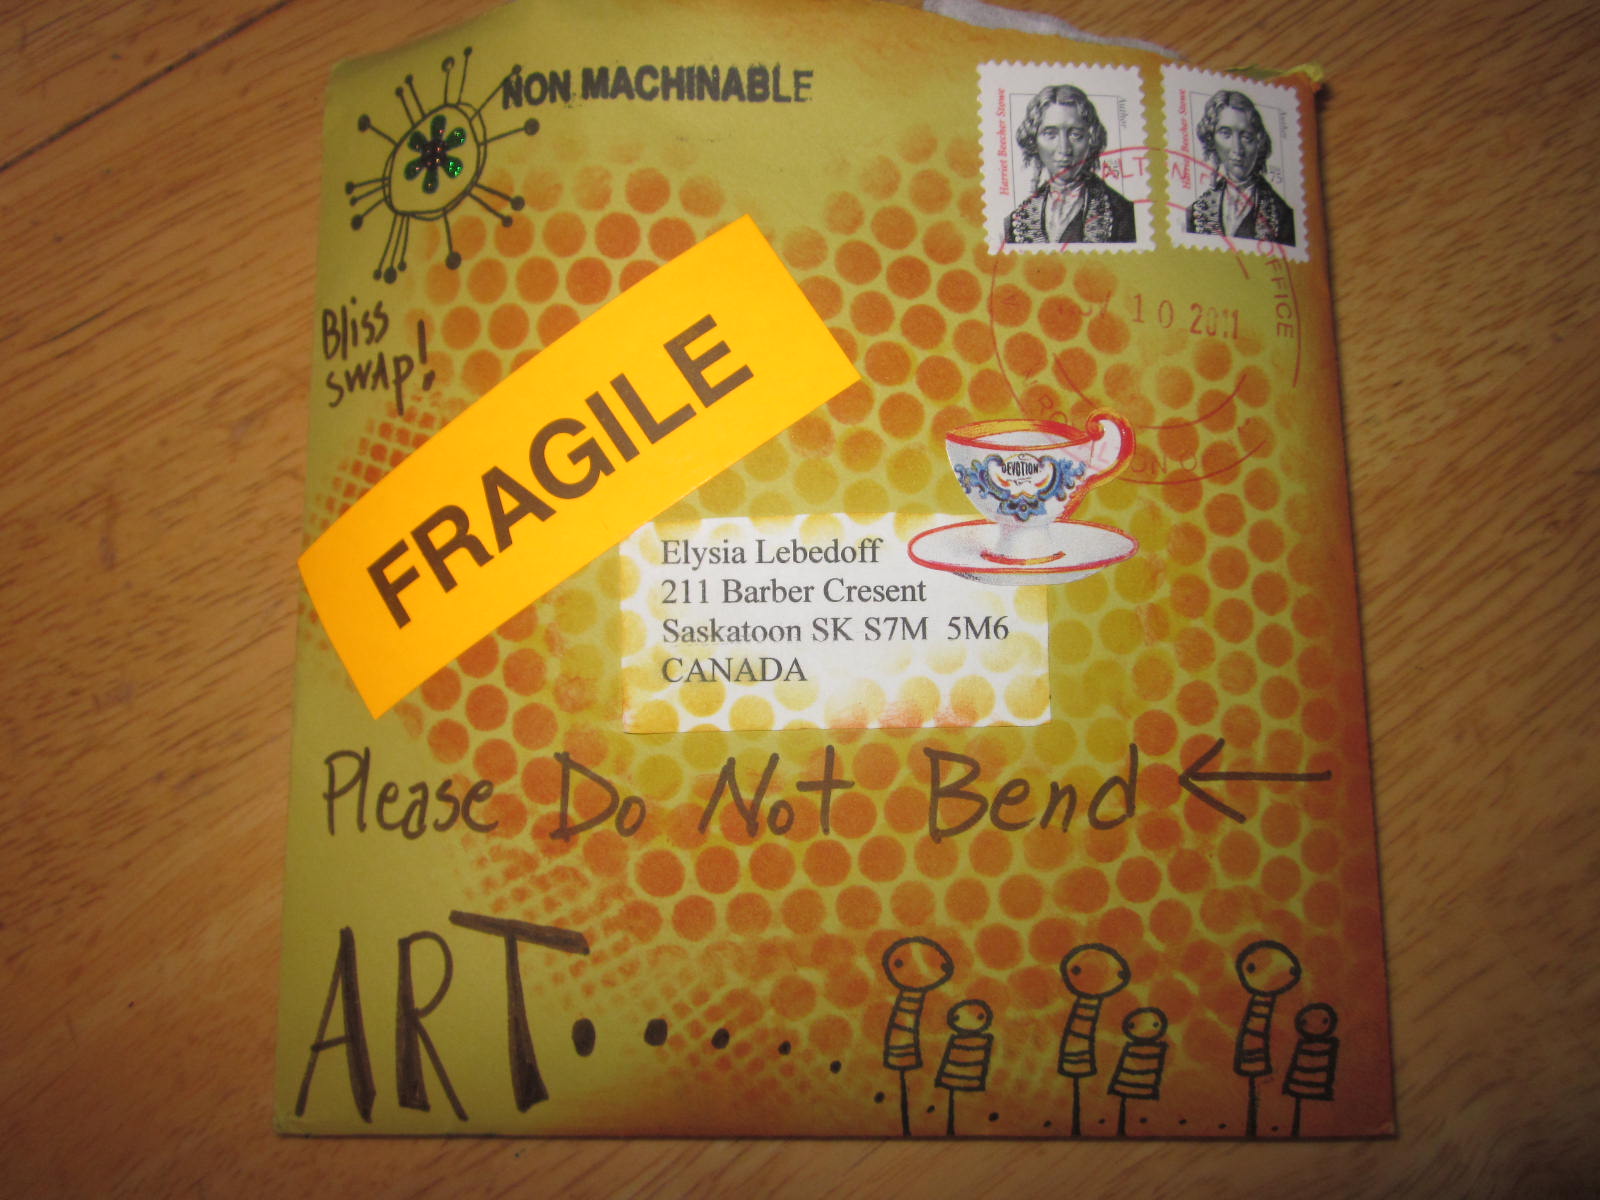
 This is the cool envelope I received!
It got me thinking I really need to spend some time on my envelopes to give the mail more of a wow factor!
 cool stamps
Cute little dudes along the bottom edge!

Here's what was inside:
Handmade card, and Thankful ATC

And a great assortment a goodies to boot!!
 Thanks for the awesome cards, and the extras Jane!!!

Now back to swap-bot, I got these cool stickers in an international trade.

And this cutie-pie digital ATC from Miseducated!

I also did a mystery envelope swap through Swap-bot and got these cool goodies:
Some ATC sized papers, and mini box, and envelope of tiny things.

 ATC, and awesome pansy stationary pieces
Teddy stationary pieces, and notepad papers

Stamped images

 and this cute zippy bag with tiny stickers!
YEAH!

I also did a birthday card exchange via swap-bot, as my birthdays coming up on DECEMBER 17TH!
It's so hard to think about being 35 at this moment, but I'm hoping it will rock!
Here's my first of 3 cards to come:

And what a cool scarf too!
Thanks so much!

Well hope this was all thrilling for you all, and sorry I'm not sure of who did what for somethings, but I promise within the next couple of days I will try to rectify that, and add in some links.

If you see something here that you sent, by all means help my scramble egg brain and send me an email:
4bebee@gmail.com
or if you want to send me a birthday card, I would be super happy to get it!!
i LOVE mail!

E.Lebedoff
211 Barber Cresent
Saskatoon SK S7M 5M6
CANADA

Thursday, November 17, 2011

November kit~ The kit that keeps on giving!!

So, as I said I would have more for you to see! I've been a making (and swapping) fool!
First I'll start out by saying I took this wonderful idea from a swap I had signed up for via swap-bot for a tea exchange. The rules were simple: pick 2 tea bags, and ship them to your partner. I know how much easier can that be! Of course if you make it a nice gift you get a better rating, and who doesn't want that right!
I did a few of these swaps, then I wondered if I could make a holder/ card for them with some of the papers from my Scrap'n with Flair kit. So, I did a Google search for a tea card and then came up with my own sort of idea.

Here's the front, tied closed. The paper was from my kit, and the ribbon was found in my personal stash.
  Another angle...

 The inside has 2 pockets, are both different patterned papers found in the Scrap'n with Flair monthly kit.
I filled each pocket with a different flavor of tea. Yum!

For the back. I printed out a cute little saying to do with tea.
I really hope my swap partner enjoys their tea!

My next project was an idea I've been brewing for quite a while, and since the Scrap'n with Flair's monthly kit this month is a card kit, I figured that this would be the perfect time to do it!

I went shopping at my local thrift store and found this kinda ugly, but fully functional vintage card holder.


I bought this jar of chalkboard paint a few months ago thinking I needed for something,
and then decided that it would be perfect to paint this project with!

I sanded the card holder gently with a fine sanding block just to remove the shiny finish.

Here's how it looked painted (not sure why the photo looks like it's blue?! It's really forest green.)
 Now as you can see the weird decorative design showed threw slightly because it'd indented into the wood.
But really it's OK, because I decided I was going to decorate each pocket anyways!
Here's what I came up with:

This top one I decorated using 2 different ribbons found in the kit, as well as a paper piece from one of the kit tag pages. The 2 Christmas balls, and the "baby it's cold outside" saying I found in my personal stash!

On the second pocket I tried something kind weird and new (to me anyways):
I went and found my son's sidewalk chalk, took out the cute stamp I got with my kit, and colored over top of it. Then I "stamped" it onto the chalkboard finish of my second pocket!!
Next I took the chalk and drew in the hill and tree free hand. And voila!!

You can't tell me that is not cute!

I then finished off this pocket with a few confetti snowflakes, and a saying I found in my personal stash!!

And last but not least, the bottom pocket. I used a paper piece from one of the kit tag pages, as well as the lovely flowers! Lastly I added a little bling with some red pearls found in my personal stash!

 I then finished off the very bottom with some more of the gorgeous silver ribbon from the kit!

And here's the whole finished project!

 The card holder was bought for $3.99 used
Chalk board paint was on sale at Walmart for $4.99
The items used were either from my Scrap'n with Flair kit ($25.00) or on hand
All together it maybe cost me $12.00 at the very most!

This lovely piece is now hanging on my wall in my crafting area, and I love it!!
I can hardly wait to fill it full of cards!


Sunday, November 13, 2011

sCRAP'N WITH fLAIR DT~ November Kit Card with step by step instructions

Hello all! Sorry for the length between my posts lately, but I've been doing more making and trading then typing!
Scrap'n with Flair's monthly kit has been released early this month in order to give you plenty of time to purchase and receive it before Dec.1st. As it's a great card making kit, and we all know the upcoming  Christmas season is the perfect excuse to make and give cards!!

This is a great kit:

It contains:
4 – 12 x 12 sheets of Christmas Paper (papers vary per kit)
2 – 6 x 12 sheets of MME Christmas Glitter Paper
1 Pkg Prima Say It In Crystals Bling (may vary per kit)
48″ of coordinating ribbon
1 CC Design Stamp (vary per kit)
1 small small container of Polar White Flowersoft and Flowersoft Glue
Tags, chipboard covers, card bases, envelopes, glassine paper, flowersoft card topper, flowers, leaves buttons and brads…..
So much good stuff!!

So, here's my first card project made using this kit, and I'm including a few step-by-step photos for you so you can make it the same or use mine as inspiration to make you own.
First I found a plain red card stock card in my personal stash (if you want you can just use a plain white one that's included in the kit.) My card measured: 6 3/4" across x 4 1/2" tall when closed, the kit cards measure: 5 1/4" across x 4" tall.

I then took one of the designer 6x 12 papers and cut it down to size to fit the dimensions of the top of my card, using my small paper cutter. 

This piece measured: 6" wide x 4.5" height. (you would need a 5" wide x 3 3/4" tall for the kit card)
I then glued this to the top of my card, mostly on the right hand side,
leaving a 1/8 th" margin of the card stock showing around the edge.


 I wanted to use the "Sparkle" one.

Next I took 2 of the ribbons from the kit, to make my trim. 


I cut the red velvety one to a 5" tall size. ( 4 1/2" needed for the kit card)
Then I folded the organza ribbon,
 To make 3 pleats.

 Then I folded over the edge and cut along it.

Next I took the velvet ribbon and tied the organza to it approx. in the middle.

 Next I secured the ribbon to the left side of my card, wrapping the excess around the edge to the back,
and trimming the bottom to fit.

 Next I took my sentiment cut from the 12" page,

And using my STICKLES in Frosted Ice, (I got in my October kit) I went around the edges to add a little "Sparkle".

 Then I added some liquid pearls, in white opal to a few white areas on the ornament.
And lastly adding a Say It In Crystals Bling, to the center of the ornament.
 I then glued the sentiment just under the edge of my ribbon.

And here's the finished card!!!
Hope you like it, and enjoyed my tutorial on how to make it!
Happy card making!!

Search This Blog