Saturday, March 31, 2012

March's craftiness coming to an end...

Hello ALL!! I hope your having a great weekend, and enjoying the spring weather wherever you may be.

Here's a single scrapbook page I managed to create at the crop I was at last weekend, using my  kit of the month, and some words I found at my local Dollarama.


I fussy cut the flowers by hand. 
 and added them to my page using these foam squares

  I love the 3D effect it gives them.

 I also added a touch of frosted ice stickles here and there to give the flowers a glittery look,

 and added some white opal liquid pearls to the center dots to add extra dimension.

 Here's a close up of the 2 chip board wording stickers I used,
they came as part of a big sheet, I got from the Dollarama.


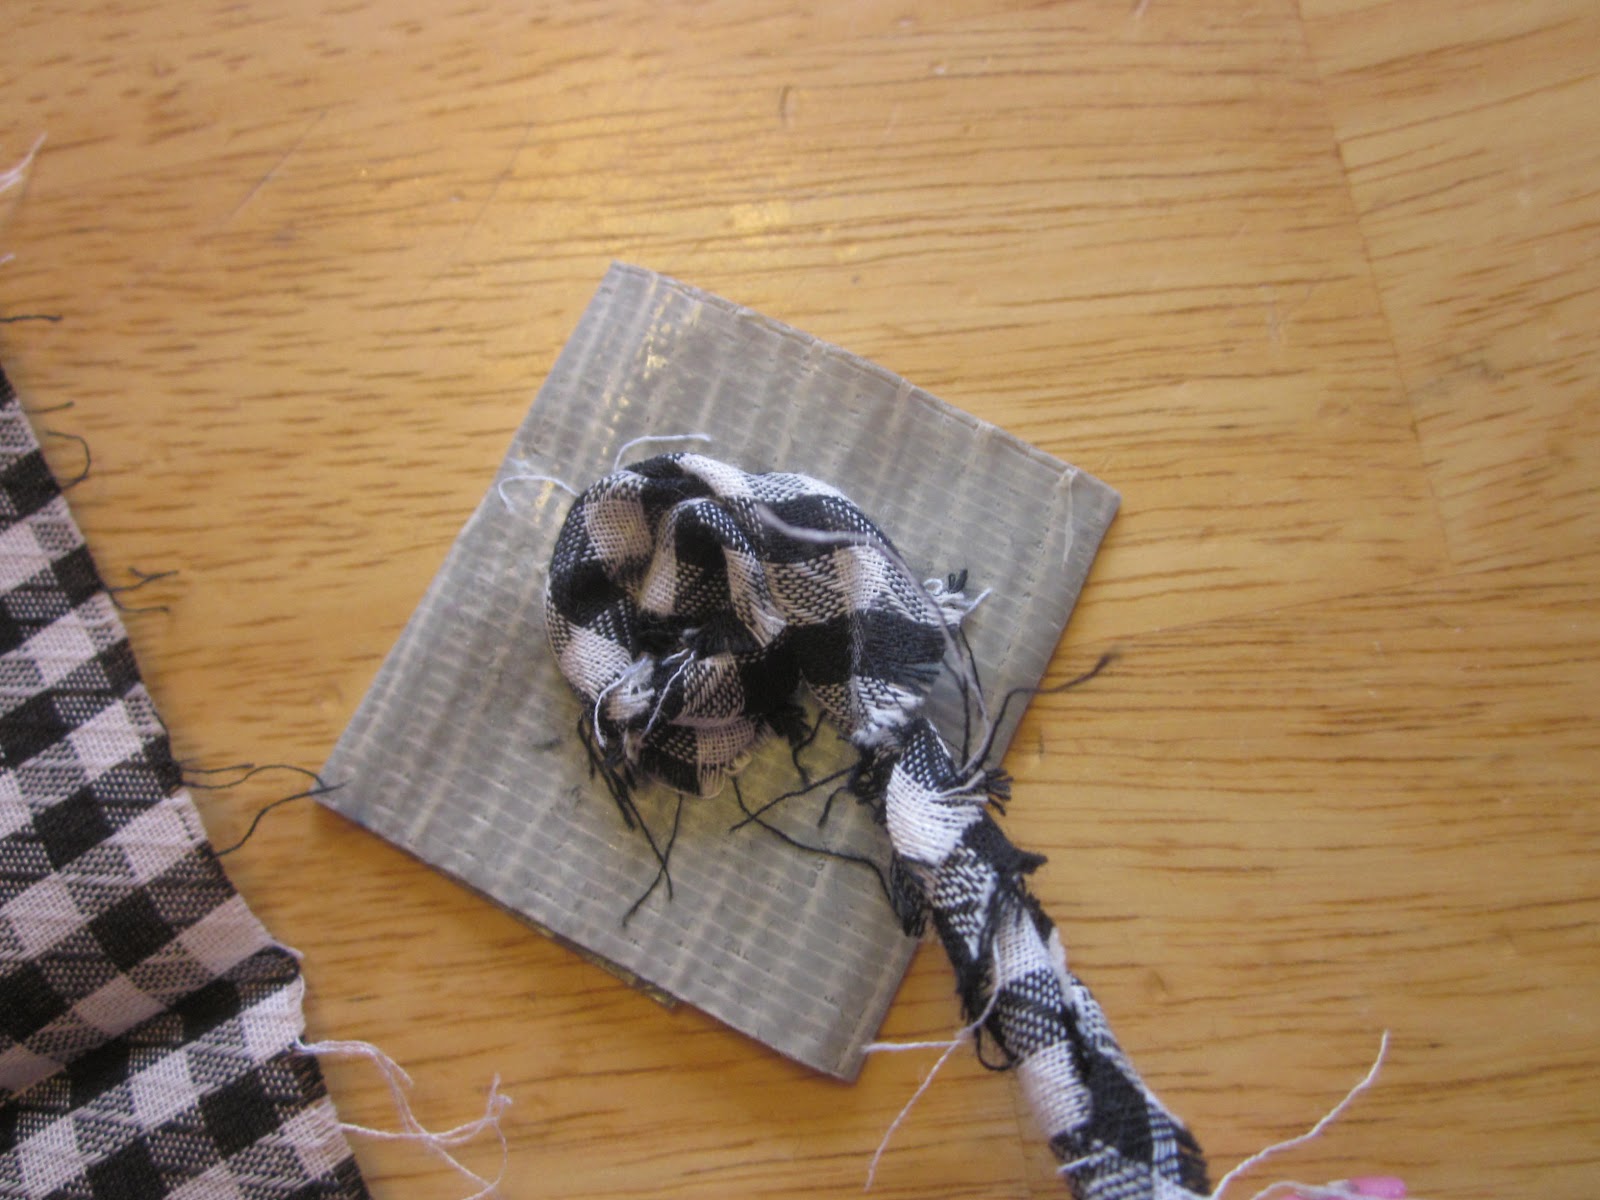
Also in the spirit of spring, with Easter around the corner I made a special hanger for my front door!
All the supplies for this project were from my local Dollarama store.


This project cost me $8.00 in supplies (with some left overs)

I got my inspiration on Pintrest!
from this:
Easter Bunny door hanging

I know it's no where the same end product, but that's where my idea came from!!

I hope you've enjoyed my craftiness!
~Elysia


Tuesday, March 27, 2012

Greetings!


The first one was made using these goodies, mostly from the kit!

Here's what the front of the card looks like +

Then I added a few buttons along the bottom edge,
 for a little extra something!

 On the inside of the card I used the stamp set included in this kit!
 And embossed them with Broken China - Distress Powder
 Then I outlined the lettering with black pen.
 and used my white ink dabber to add some wispy paint streaks
  around the edge to highlight it.

 To the bottom I added a little message with this swirl clip I had on hand.

This card sure did make me smile!!


 Here's what I used for my second card:

First I cut a piece of the stripped paper from my kit to fit  the front of the pink ready-made card I had.

Then I inked the edges with black archival ink,  and applied it to the front of my card.

Next I decided to make a flower....
 bring on the duct tape, LOL
 Cut a piece, roll it up and stick it to your work area.
OR if you have any LARGE GLUE DOTS they work wonderfully, as they are adhesive on both sides!!

 Next take your ribbon of choice, mine is the checkered one from the kit,
 and start by twisting it. Next stick the end to the center of your duct tape.
Continue twisting it, and roll it around itself, sticking it to the tape.
 Basically you will end up with it looking like a cinnamon bun shape.
Then cut off the excess duct tape. 

 Here's the back view!
Once you've done that glue down any loose edge with Glossy Accents

& add a rhinestone to the center. 

This tiny piece of ribbon with pin was left over from my 2 page layout!
Who knew this scrap would look so good ?!


 To achieve my finished card front I inked the edges of the printed ad,
with Tea Die Distress ink, then glued it diagonally on the card.

I then accented it with my handmade flower, some black rhinestones also from the kit,
and a remaining snippet of left over ribbon with pin also from the kit.

 And here's the inside.
I used the other half of my vintage ad ,which was also inked, for the left side.
And I left the right side blank to add in a personal note later!

I hope you've enjoyed my cards, as much as I did making them!
~Elysia


Wednesday, March 21, 2012

SWAP SIGN UP ~EXTENDED

Due to the lack of immediate sign up responses, I have decided to extend
the sign up and mail out dates for this swap!


FOR THIS SWAP:
The contents of your envelope MUST BE
VICTORIAN/ vintage THEMED

YOU MUST PICK:
3 items from the following list to send:

3 vintage typed book pages
OR
3 VICTORIAN THEMED photos (wallet size- minimum)
OR
Patterned papers
1302636932_wpus1796d-Tea-time.jpg 
OR
pages of sheet music
OR
2. product advertisements
1319828551_g4500386.jpg
OR

greeting cards/ trade cards
 
OR

1 (6"+ size) paper doll assembled

+ pick 2 ITEMS FROM THE FOLLOWING

6 various buttons
 
OR
 4 assorted feathers
OR
3 handmade stick pins/ hat pins
OR
3 vintage themed die-cuts
 
OR
1 pkg. of rhinestones/ pearls applique (in a design/ pattern) 

+ pick 1 ITEM FROM THE FOLLOWING:

crocheted or fabric flowers/ dollies -2" min. size
1302637423_wpem02--Designer-Threads-Doillies.jpg 
OR
3 pcs. ribbon ~ MINIMUM of 12" length
 
2 pcs. lace ~ MINIMUM of 12" length 
OR
metal charms (keys, etc ~ minimum 2") 
OR
2 vintage fabric swatches (minimum 6" x 6" square)
 

MAKE SURE TO ADD A CARD, POSTCARD OR NOTE ON VINTAGE PAPER
FOR YOUR PARTNER, SO THEY KNOW WHO TO THANK!

I have had some people express concerns about not knowing if what they have to swap,
 or find via the internet is Victorian or not. 
Well, if it's vintage looking and could fit between the years:
Then it'll be good!!

I have found a few wonderful FREE image sites for you to print images for your partners from,
 if you need a little help:

~along the right hand side there's a search box that you can use to easily find Victorian images

~ FREE clip art

FREE vintage clip art

~Tons of very Victorian / vintage images

~awesome postcards/ cards

Fabulous Victorian /vintage photos!


The NEW dates for this swap are:
Sign Up By:  March 27th
Partners assigned on:  March 29th 
Mail out by:  March 31st


 TO SIGN UP Email: 4bebee@gmail.com

Friday, March 16, 2012

March Kit for Scrap'n with Flair

This month I had the privileged of making my own SCRAP'N WITH FLAIR kit!!
I went with Leanne through some ideas, and basically came out with a kit
packed FULL of Elysia's FLAIR!!


So hears what is in the kit:

PAPER:

1  BoBunny 12" Petal Pushers- STRIPE PAPER  
2  BoBunny 12" Petal Pushers- DOTS PAPER       
1  BoBunny 12" Petal Pushers- GARDEN PAPER                  
1  BoBunny OLIVIA CAMEO DIE CUT PAPER                          
2  BoBunny 12"  OLIVIA CASHMERE PAPER                          
1  BoBunny 12"  OLIVIA BABY'S BREATH PAPER                   
1  BoBunny 12"  OLIVIA AMBROSIA PAPER                             
1  BoBunny 6" X 12"  OLIVIA HONEYDEW PAPER                  
1  BoBunny 6" X 12" Petal Pushers- WHOOSH! PAPER             
1  BoBunny 6" X 12" Petal Pushers- GARDEN PAPER                

ACCESSORIES:

1  BoBunny iCANDY BRADS                                                    
1  BoBunny BUTTONS & BLING                                                 
1  BoBunny iCANDY DIMENTIONALS                                       
1  BoBunny iCANDY JEWELS                                       
1  BoBunny WRAPS- WHOO-LIGAN                         
1 3pk. CANVAS DESIGNS- CIRCLES                                      
1 3 pk. INKADINKADO MINI STAMPS-  THINKING OF YOU        

THE PRODUCT TOTALS over $ 30.00

I seriously had fun making it up and picking out all the MANY embellishments!!
You know me I love my goodies, and I hope you will too!!

So, for my first project I decided to make a 2 page layout for my daughter's 2nd birthday!!
Everything you see, except the extra large flower and the sequined butterfly, are from the kit!!

Page 1


 Page 2


I hope you like these layouts! And you can expect more to come!!
 <3 ~Elysia


Search This Blog