Tuesday, February 28, 2012

What a weekend!

So Scrap-a-palooza 2012 was great!
I packed some stuff, and off I went to enjoy the day of food and prizes!


All the ladies from our design team were there, so we decided to get a few photos together. 

 The gym was packed full of 50 ladies


 and 3 vendors of scrapbooking supplies, 
including a impressive spread from Scrap'n with Flair!

I did an ATC make-and-take for Scrap'n with Flair,


and it was received very warmly and enjoyed greatly by everyone that decided to give it a try.

There was a great variety of different looking ATC's made,
and only 1 person that wanted to swap her's, so I traded her (of course)!
I had a great time, and am looking forward to next year already!
>. o .<

AND THEN:
I found this in my swap-box inbox today! I WON!!


Date:Feb 27, 2012
Status:new
From:racheljohnson
Subject:You won the Pins & Needles giveaway!!
Hi! I am happy to tell you that you were the winner of the Pins & Needles giveaway on the Swap-bot blog!! Yay!
http://blog.swap-bot.com/2012/02/27/pins-needles-giveaway-winner/
I will send out the fabric prize pack to you this week.
Happy swapping,
Rachel Johnson
Swap-bot Admin

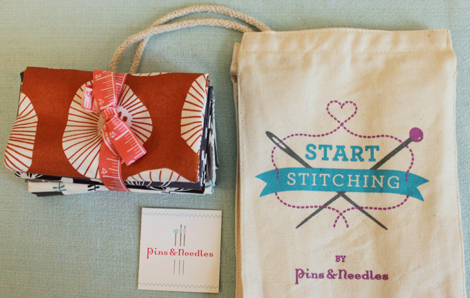
And this is what I won:
I guess I will have to make some cute stuff with it...

Friday, February 24, 2012

Crop this weekend!

OMG! Do I really have time for this?!
I signed up for a crop this weekend, not knowing at the time I will be off and flying to Peurto Vallarta, Mexico next week on FRIDAY NIGHT! OMG!
I have so much to get ready before then, but have to stop and hyperventilate first!

Watercolor Paintings by Agnes Cecile painting art

I feel excited and silly, as I crazily flitter about my house trying to gather a million things into piles of things to be packed activities that need to be done. My kids are following me from level to level in wonder and anticipation of what this may accomplish.

So far: I have gathered everything together for my next month kit, from Scrap'n with Flair. I will tell you there are only 2 of MY kit available for purchase so when you see it, and if you want it don't hesitate to buy it! It is PACKED FULL OF GOODIES!
I will be bringing it with me to Scrap-a-palooza 2012 February 25th, which is tomorrow... maybe to work on it, maybe not... I'm not sure yet.

I also have everything ready for the "Make & Take" I'm teaching!! OMG, YEAH I"M TEACHING! It's such an honor that Leanne has such confidence in my and my abilities to let me do this! THANKS AGAIN LEANNE! I can't wait to show the ladies what I know, and introduce them to ATC's (a mini work of art for trading)


I rounded up a bunch of stuff to pack, but know I won't have anytime to actually get it done today, but things are there to get into my suitcase...

and now... I need to search my mountains of photos for some I want to use:
a) with my kit (maybe my daughter's birthday?)
b) that I really just feel like scrapbooking (ex) Las Vegas photos in my new book

I don't know........... and I them done tonight for tomorrow. Take about last minute procrastination.
OK, I'm off to do instead of type! And, I'll be back to post photos of the event and my 1st "Make & Take"!
~Elysia

Friday, February 17, 2012

MAIL!

So, as you all know I'm a swapping fool!
Well seriously, I've decided after the last 2 weeks of making and mailing I just HAVE TO SLOW DOWN! In one week alone I spent my most EVER on postage a whopping $25.00 in one day
+ another $8 that same week... TOO MUCH!

But man was I mailing out GOODIES packed full of allot of LOVE!
Here's a look at 2 awesome matchboxes I made and traded on Swap-bot!

I used this recommended template, and cut it out from this sweet heart paper found in the February kit.

I added the vintage feather ribbon, also found in the kit, to the sides.
And a tiny piece of the rosette ribbon on the bottom corner.

The L-O-V-E letters were painted with the Ranger Adirondack, Snow Cap, Paint Dabber,
all included in this AWESOME FEBRUARY KIT. 

I stuffed it full of small goodies like brads, eyelets, rhinestones, charms and ribbon.

I also added a couple tea packages and a large amount of brads to the package!
Don't you LOVE the vintage valentine file I found of MATCHES!!
My partner said she loved it! <3

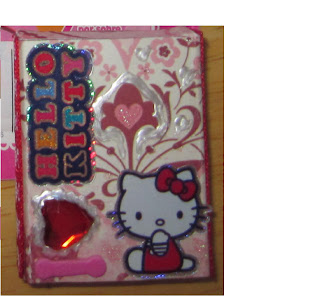
I also sent out a KAWAII Matchbox swap, as you can see I made it Hello Kitty style!

I made it using paper from our February kit, accented with some frosted stickles and that same matchbox template. And of course I added some Hello Kitty stickers and a rhinestone from my stash.

I packed my box with tons of sticker flakes, some KAWAII ribbons, 
and flat back goodies!

Plus: I added all this too!
I can't wait to find out what my partner thinks?!
I hope I did OK!

I also got a lot of praise for swapping this ATC (actually 2 were made)
It was for a lily ATC swap on Swap-bot.

This was my first time ever making this kind of coloring book typed ATC. The image I printed, and then colored using Copic Markers that I borrowed from Lee.

And since it was a flower themed ATC these are the goodies I sent with it!


I also sent out this variety of buttons and some vintage button cards I printed out,
and ended up getting some great ones in return!

OK, so I have a few freebies to share:

Here's the sweet match themed Valentine I found to send out with my matchbox swap!

 This vintage buttons card is simply to great to not share!


I simply LOVE snail MAIL!
<3  Elysia

Wednesday, February 15, 2012

HAPPY Valentine's ~ KIT!!

hAPPY vALENTINE'S dAY + 1!

My son has taken all of his Valentine's off to school... and put on a darling program for us parents!
My daughter has thrown fits of love all day long...
and my husband.. well, lets just say he's awesome!
And we both enjoyed the Valentine's plans we made.

Speaking of making things:
I bought this sweet canvas and frame for $2 at my local Dollarama store a few weeks ago,
and decided to give it a make over!

 First I painted the whole canvas with the Ranger Adirondack, Snow Cap, Paint Dabber, included in the kit.
Then I sprayed the whole thing randomly with tattered Angels Glitter mist in Brick Red.
Then I applied a piece of the 12 x 12 patterned paper, also form the kit.
I distress inked the edges with Barn door (red).

 I added some handmade stick pins I made, to this wonderful crochet flower, also found in the kit!

 I wanted to create a sort of banner effect.

So, I used a thin ribbon, added the charms I made (all items needed found in the kit)
and 2 tickets (from the kit), and a sweet vintage image I found on the internet (I can't find it again SORRY)

 I got this rhinestone "LOVE" from the Dollarama as well, and accented it with these metallic leaves!
I then added a rhinestone to the top right, and bottom left corners, to finish off them off.

The bottom right corner is filled with a golden Eiffel tower, and metallic rose both from the kit!

I love the 3D effect that the crocheted flower adds!

This sweet canvas has spent the past week in the center if our table, as inspiration to LOVE.
~Elysia

Monday, February 13, 2012

VALENTINE'S prep DAY & TAG SWAP

HELLO! I'm guessing we're all excited, and hopefully ready, for the most romantic day of the year (tomorrow).

Well maybe not quite... we still have a few things to do like address all my son's Valentine's for his class friends, and make some pink iced chocolate chip muffins for my kids. Oh and then there's the setting out everyone's goodies so they can have them tomorrow.
OH, and I need to fix a little flub up I did. I forgot to return a note on time... so my son misses out on hot dog lunch tomorrow. : (  Not a huge deal to me, but I do know he's disappointed so I was thinking, "I'll just make him something super special!"
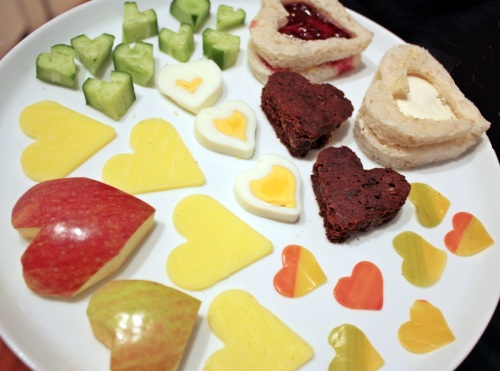
Maybe like this:

or
minus the eggs (egg free school)

THIS IS A GREAT 1!
I've been toying with a border-line love for "Bento box" style lunches for a while,
so I think I'll try making my own Combo of all 3!

And, yes you can bet I'll take some photos!

ALL THAT SAID:
I ALSO WILL BE ASSIGNING THE PARTNERS FOR MY VALENTINE'S THEMED TAG SWAP SHORTLY, so check your emails ladies for your partners info!
If you can please contact them direct as well to let them know when you mailed it that would be great!


THANKS, and HAPPY VALENTINE'S PREP DAY!
~Elysia

Friday, February 10, 2012

Valentine's Card

It's been a rather strange week for me... my hubby is out of town for management meetings, so I've been home alone with the kids. Except for the a few hours out working and doing my exercise class, thanks to my M-I-Law, it's just been me and them. That along with a few other things has me seriously thinking about how different it would be without him.
I'm not going to lie and say we're that "perfect couple" or even a "match made in heaven" but he really gets me. (Even though sometimes he pretends he doesn't, he still tries to be supportive.) He does more then his best with our kids, helps out around the house (when I harass him enough) and occasionally he even comes up with the sweetest things any girl could dream of having their man do! It is from this that I got my inspiration for the card I made.

That said here's a look at another project I made last week using the AWESOME: SCRAP'N WITH FLAIR FEBRUARY KIT, plus a few extras! This is also a step- by- step view of what I did to achieve it.


 Here's all the products I used, PLUS my glue gun!

 This lovely vintage style lace is available @ Scrapin' with Flair, by the meter.
(Just tell Leanne you want it!)

 I handmade this pin, using a long stick pin, and beads.
(email me if you'd like one)

 I fussy cut this cutie from one of the Sweet Nothings 6 x 6 paper pads pages,

 I wanted to surround it with the lace. So I figured out how and where I wanted to start it,

 folded over the edge to make it round like the top of the heart,

 Then I applied the hot glue between the pleat.

 Then I repeated the step again, going around the whole top.

 folding it over to create the rounded edge,

 and gluing with my glue gun between the pleat I made.

 Then I held the lace straight to the bottom of the heart,

 folded the lace in half and upward starting toward the top of the other side of the heart.

 I then removed the heart, and applied glue under the seam.

 More folding to create the rounded heart top!

 Open the pleat,

 YEP GLUE HERE!

 Fold over the remaining end of the of lace and match it up with the start, so no rough edges are showing,

 Glue it in place! Just remember you want the edges all to look neat,
but the center will be covered with our paper cut out.

 You can now glue your cut out in place, like so!!

 I then added my stick pin, and glued the heart to my card!
The card itself was made using 1/2 of a 12 x 12 sheet included in the kit.


 and a few awesome feathers I have in my personal stash!

 I lastly added this heart from the kit using a glue dot, to cover the bottoms of the feathers.

 And here's my finished card! 

I absolutely love the romantic look of this kits elements,
and the vintage feel the lace, feathers and handmade stick pin added!

I hope you like this card, and that it inspires you to try new things you've never done before!

Also there is only 2 days left to sign up for my TAG SWAP!
PLEASE EMAIL ME at: 4bebee@gmail.com to join the fun!

TTFN ~ Elysia
Search This Blog