
Using my fabulous self named ~ Elysia's kit from Scrap'n with Flair I made 2 different cards!

The first one was made using these goodies, mostly from the kit!
Here's what the front of the card looks like +

Then I added a few buttons along the bottom edge,

for a little extra something!
On the inside of the card I used the stamp set included in this kit!
And embossed them with Broken China - Distress Powder

Then I outlined the lettering with black pen.

and used my white ink dabber to add some wispy paint streaks

around the edge to highlight it.

To the bottom I added a little message with this swirl clip I had on hand.

This card sure did make me smile!!
Here's what I used for my second card:

First I cut a piece of the stripped paper from my kit to fit the front of the pink ready-made card I had.

Then I inked the edges with black archival ink, and applied it to the front of my card.

Next I decided to make a flower....

bring on the duct tape, LOL

Cut a piece, roll it up and stick it to your work area.

OR if you have any LARGE GLUE DOTS they work wonderfully, as they are adhesive on both sides!!
Next take your ribbon of choice, mine is the checkered one from the kit,

and start by twisting it. Next stick the end to the center of your duct tape.

Continue twisting it, and roll it around itself, sticking it to the tape.
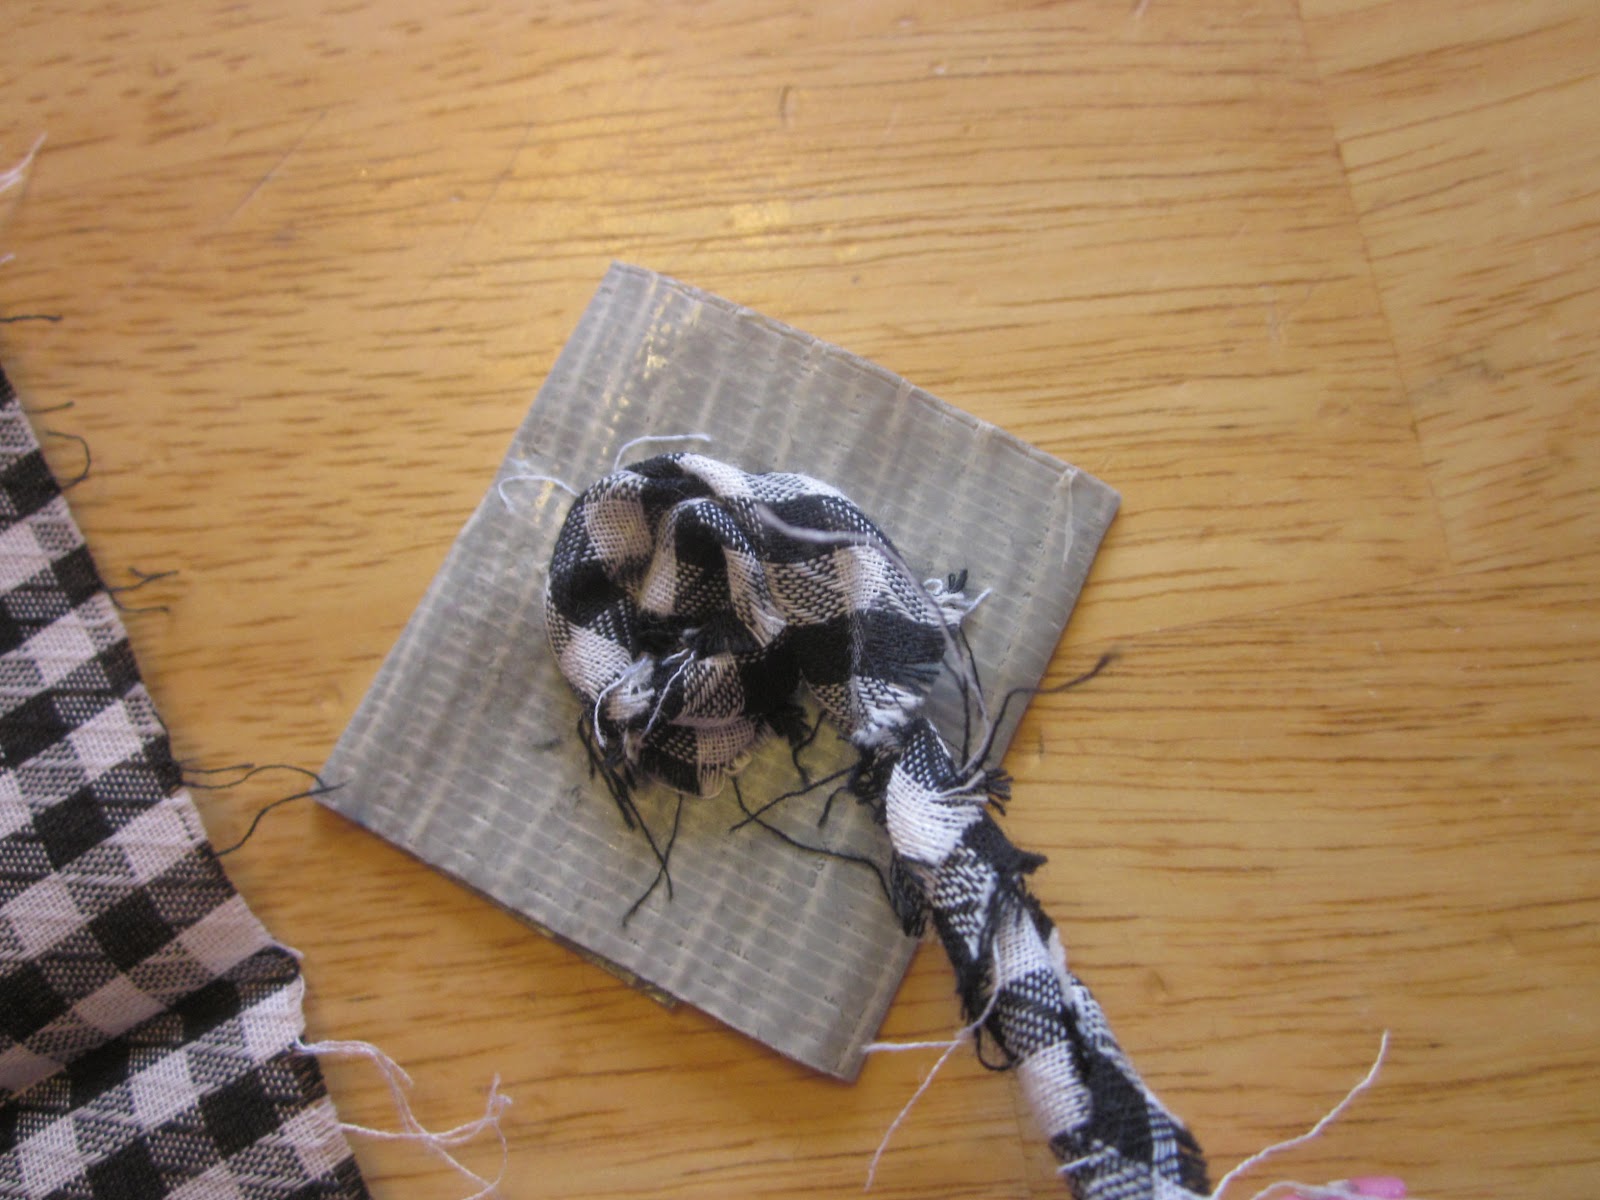
Basically you will end up with it looking like a cinnamon bun shape.

Then cut off the excess duct tape.

Here's the back view!

Once you've done that glue down any loose edge with Glossy Accents

& add a rhinestone to the center.

Who knew this scrap would look so good ?!
To achieve my finished card front I inked the edges of the printed ad,
with Tea Die Distress ink, then glued it diagonally on the card.

I then accented it with my handmade flower, some black rhinestones also from the kit,
and a remaining snippet of left over ribbon with pin also from the kit.

And here's the inside.
I used the other half of my vintage ad ,which was also inked, for the left side.
And I left the right side blank to add in a personal note later!
I hope you've enjoyed my cards, as much as I did making them!
~Elysia
~Elysia
both of those cards are fantastic, I'm so happy I received one of these. Wasn't it fun to have our own kits named after us, LOL!!
ReplyDeleteI was so glad to give you one!! Just to bad i forgot to take a finished photo of it...
DeleteAs for the naming of the kits... well i didn't know it was going to be named after us. I was personally just thrilled to get to pick out ALL the things in the kit, and to get the chance to show off how I've used it!!
Really terrific cards,love that fabric flower too !
ReplyDeleteHug, Amy Jo
fantastico tutorial!
ReplyDelete