I'm not going to lie and say we're that "perfect couple" or even a "match made in heaven" but he really gets me. (Even though sometimes he pretends he doesn't, he still tries to be supportive.) He does more then his best with our kids, helps out around the house (when I harass him enough) and occasionally he even comes up with the sweetest things any girl could dream of having their man do! It is from this that I got my inspiration for the card I made.
That said here's a look at another project I made last week using the AWESOME: SCRAP'N WITH FLAIR FEBRUARY KIT, plus a few extras! This is also a step- by- step view of what I did to achieve it.
Here's all the products I used, PLUS my glue gun!
This lovely vintage style lace is available @ Scrapin' with Flair, by the meter.
(Just tell Leanne you want it!)
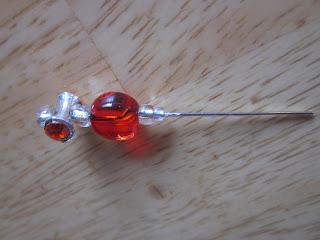
I handmade this pin, using a long stick pin, and beads.
(email me if you'd like one)
I fussy cut this cutie from one of the Sweet Nothings 6 x 6 paper pads pages,
I wanted to surround it with the lace. So I figured out how and where I wanted to start it,
folded over the edge to make it round like the top of the heart,
Then I applied the hot glue between the pleat.
Then I repeated the step again, going around the whole top.
folding it over to create the rounded edge,
and gluing with my glue gun between the pleat I made.
Then I held the lace straight to the bottom of the heart,
folded the lace in half and upward starting toward the top of the other side of the heart.
I then removed the heart, and applied glue under the seam.
More folding to create the rounded heart top!
Open the pleat,
YEP GLUE HERE!
Fold over the remaining end of the of lace and match it up with the start, so no rough edges are showing,
Glue it in place! Just remember you want the edges all to look neat,
but the center will be covered with our paper cut out.
You can now glue your cut out in place, like so!!
I then added my stick pin, and glued the heart to my card!
The card itself was made using 1/2 of a 12 x 12 sheet included in the kit.
Next I added this cute tag, which was included in the kit's ephemera.
and a few awesome feathers I have in my personal stash!
I lastly added this heart from the kit using a glue dot, to cover the bottoms of the feathers.
And here's my finished card!
and the vintage feel the lace, feathers and handmade stick pin added!
I hope you like this card, and that it inspires you to try new things you've never done before!
Also there is only 2 days left to sign up for my TAG SWAP!
PLEASE EMAIL ME at: 4bebee@gmail.com to join the fun!
TTFN ~ Elysia


Elysia Your Card Turned Out Beautiful! I Love The Lace Ruffled Around The Pretty Image! Gorgeous! Hugs,Tee
ReplyDeleteElisha, how do I join your swap? Is it still open and do you need more people. I will try to email you. Your card with the eyelet lace is very pretty.
ReplyDeleteIt is still open until SUNDAY, and I ALWAYS would love new joiners! JUST EMAIL: 4bebee@gmail.com
Delete